

app design double click to like animation
How to make ultra-smooth animations in Figma Motion plugin
And how to share them with the community and developers
![]()
Every UX/UI designer comes to the moment when they need to animate their design. And what tools should we choose to make some interactions in UI, add some stunning effects or animate some character for a mobile game?
I'm gonna show you an interesting Figma plugin to do all of this. Its name is Motion. We will quickly overview its interface, learn animations basics and even make some cool stuff.
1. Get Started
First of all we should install it. Open Figma and go to the Community.

Type 'Motion' in the search bar on the top of the page and click on Plugins in results.
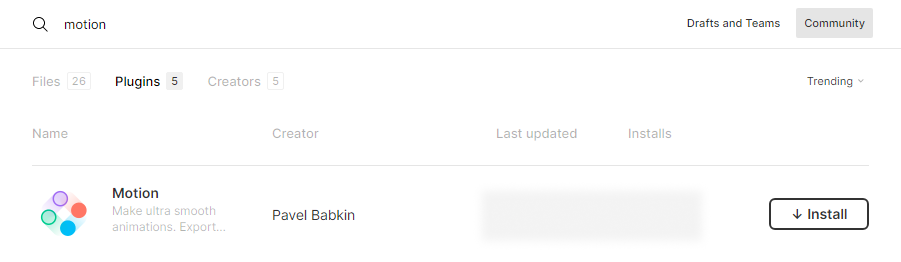
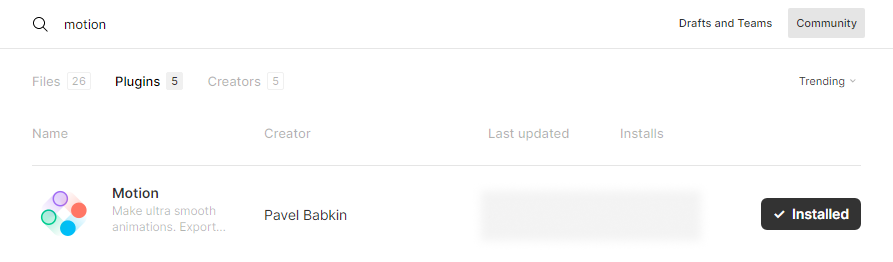
Now you should just click on Install button and that's all.
Let's add a new Figma file. From the dropdown menu select Plugins / Motion.
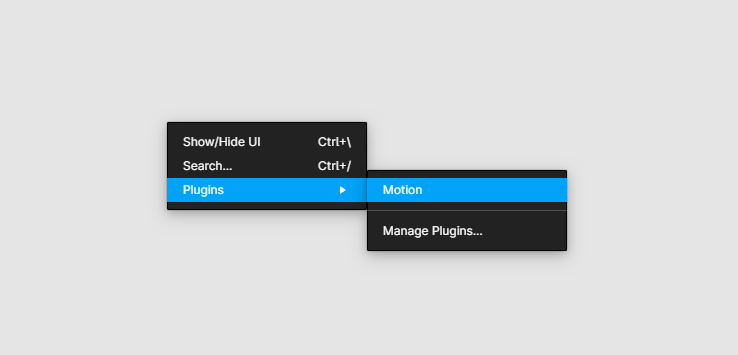
We have just started Motion. We are ready to go to the next step.
2. Overview
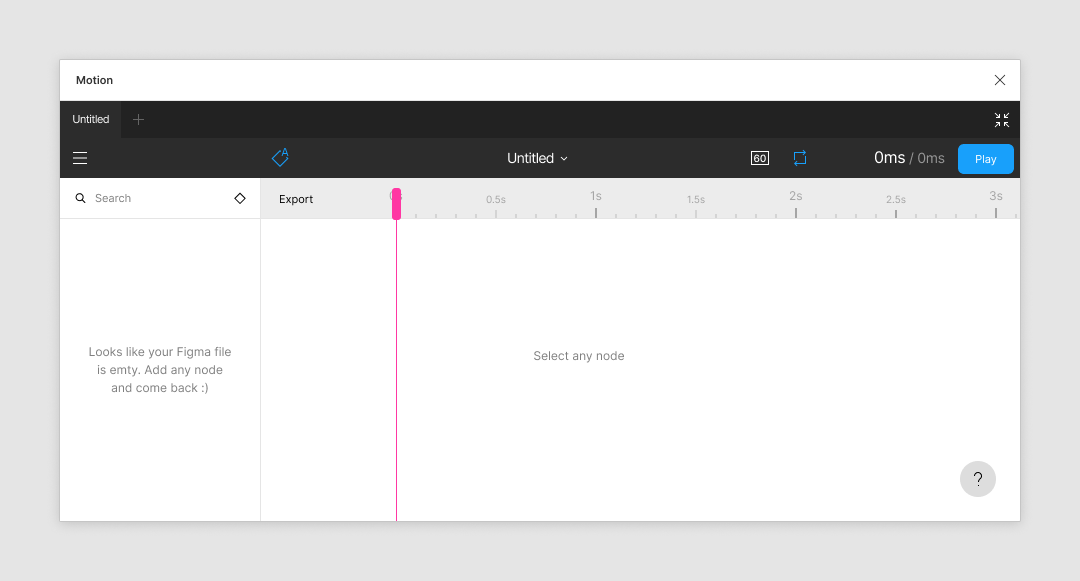
Before using a new tool we should learn how to work with it. Let's quickly overview the interface.
It looks like Figma UI, isn't it? It's good for new users.
We have tabs on the top, which are our animations, a toolbar below, a left panel and a timeline with keyframes. You can add a lot of animations for any file.

Let's quickly overview some toolbar buttons. We will talk about them in details later.

Auto update keyframes.

Preview fps: 24 or 60.

Repeat: no repeat / repeat / repeat and pause.

Play / Stop.

Current time position / total time.

In the left panel we can search layers by its name and/or filter layers with keyframes. If nothing is selected in Figma we can see layers of the file, but without sublayers. Its made for a heavy files which can be laggy. Just search layers you need or select layers in Figma and a list will show you all the sublayers.
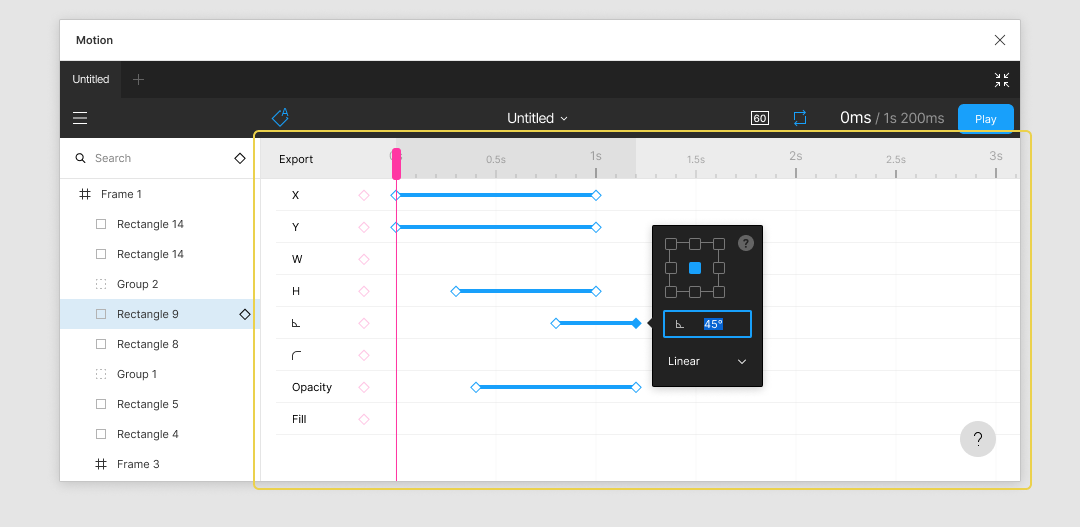
In the timeline panel we will see all the keyframes of the selected layer.
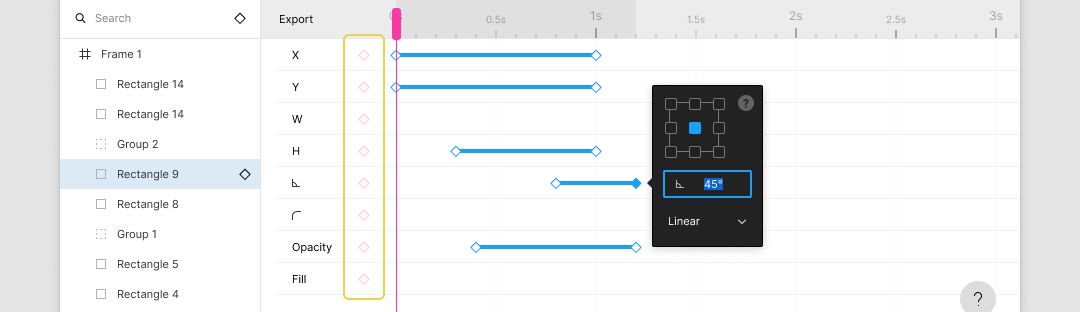
Add keyframe.
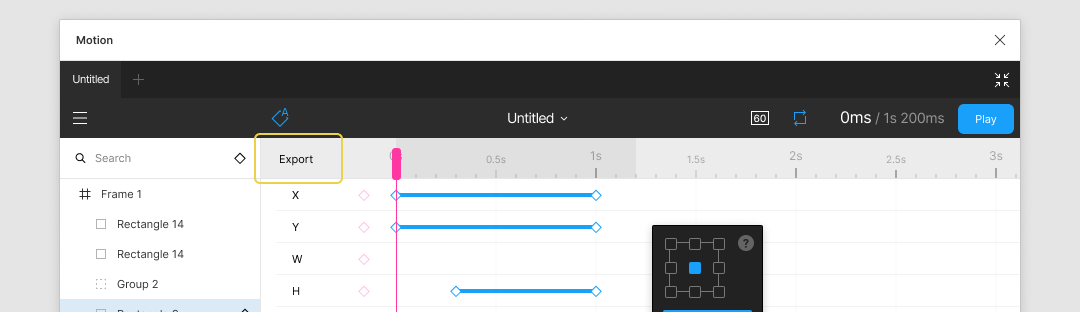
Export. With the help of it you can export any layer to GIF, Sprite, Frames or CSS.
If you work in a team, every person who has access tothe file and runs Motion will see your animations. It's good for cross using with your team and developers who will implement your animations in the code.
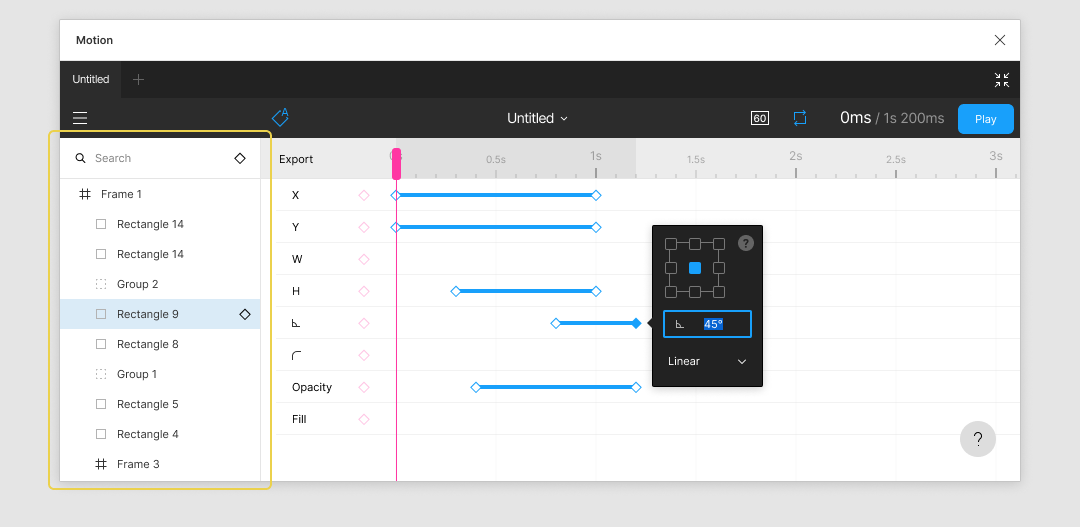
A double click on any keyframe will open the keyframe panel where you can set a rotation point, a value and an easing function.
3. Your first animation
From theory to practice.
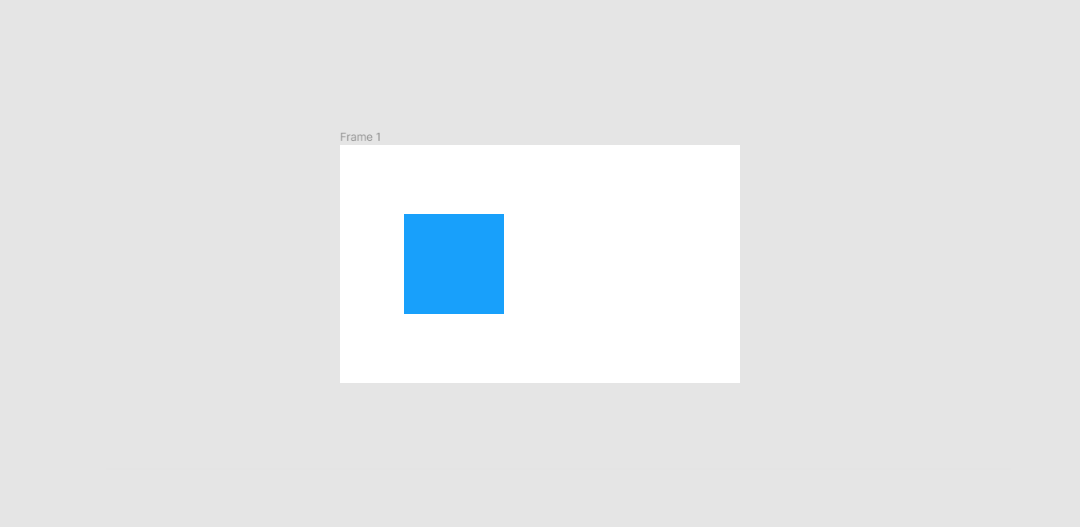
Let's create a frame and a rectangle inside it. Sizes and colors doesn't matter for now. Place the rectangle closer to the left corner of the frame in order to have some space on the right to move it.
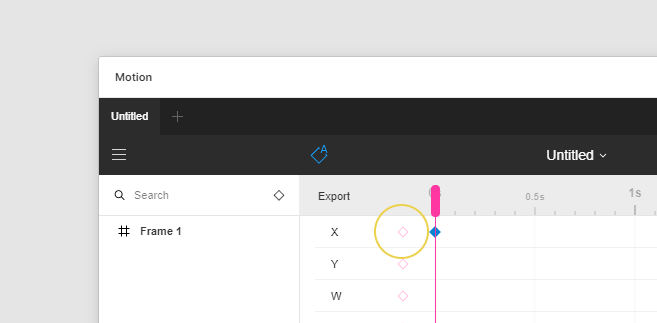
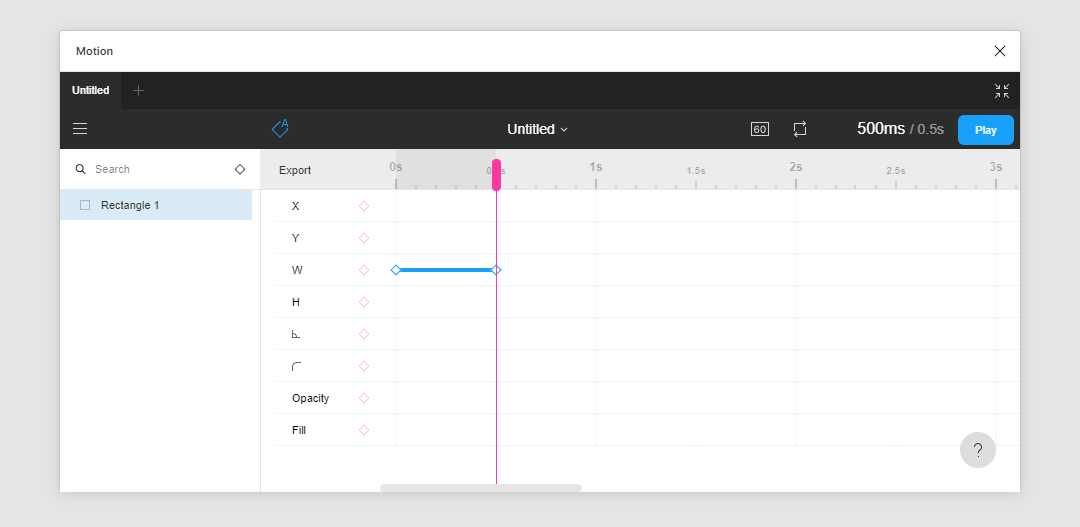
Now go to Motion and click on the Add keyframe button on the X property.
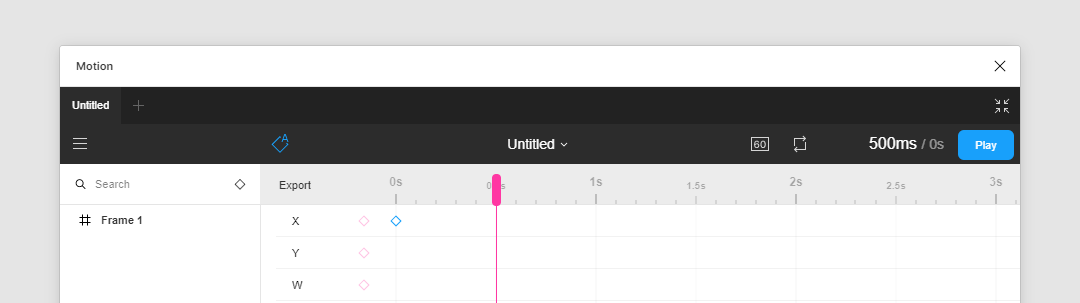
Our animation will last for 500ms. Move the pink timeline handle to the 500ms (0.5s) position.
Move our rectangle to the right, go to Motion and click on the Add keyframe button again. That's all.
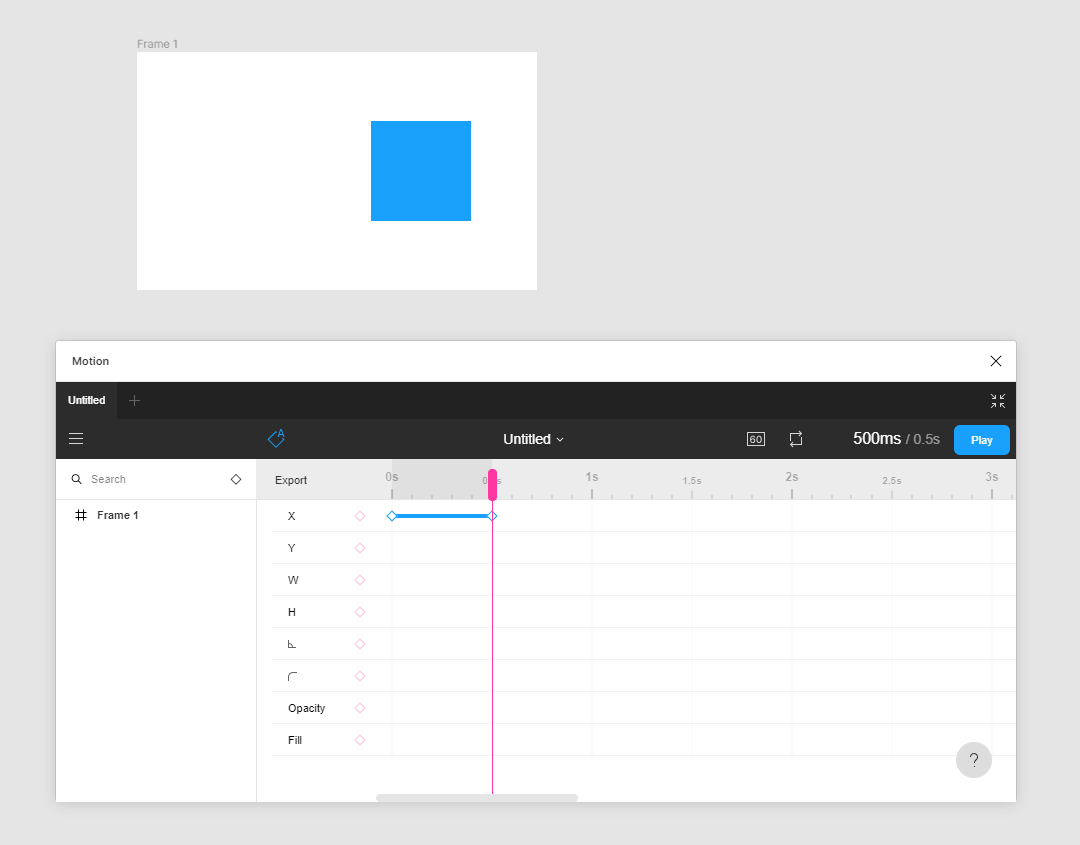
Click on Play and see your first animation. Congratulations!

With these technics you can animate all the properties you see. Feel free to change Y, Width, Height, Corner radius, Rotation, Opacity and Fill properties. Quite simple, isn't it?
4. Basics
Let's move on and dive more into details.
4.1. Rotation point
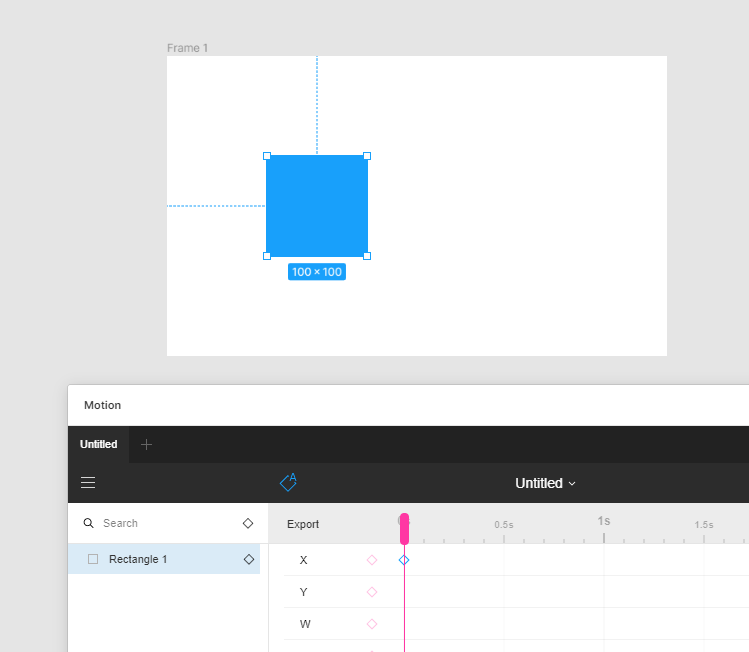
First of all we should understand what is a rotation point or an anchor point. Let's suppose, we have a frame and a rectangle inside of it. The rectangle: width = 100, height = 100, x = 100, y = 100, rotation = 0°. Go to Motion and add keyframe for the X property.
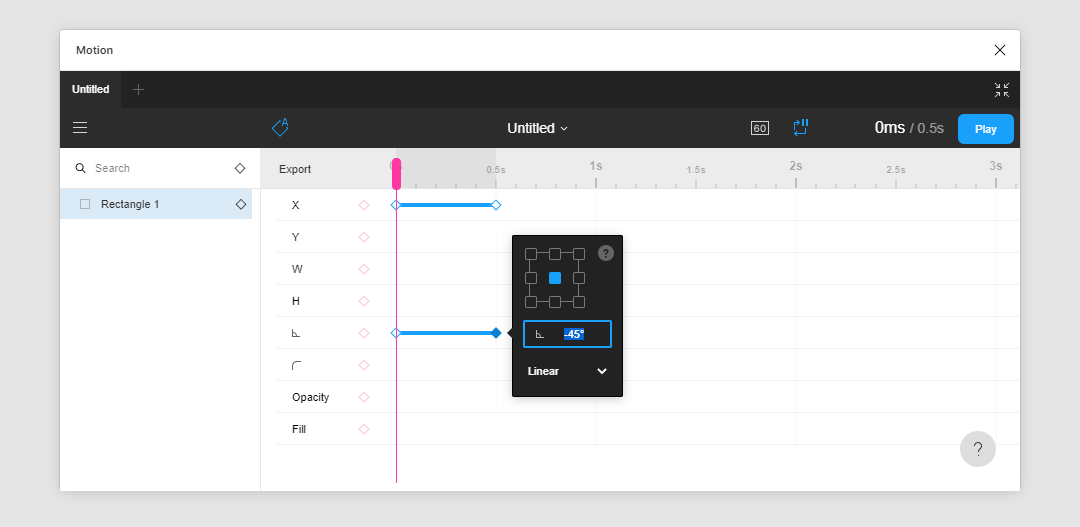
Double click on a new keyframe. Now we see the keyframe panel with some properties. Here you can set up a rotation point or an anchor point, a property value and an easing function. In Figma properties panel we defined X equal to 100, but here we see 150. Why?
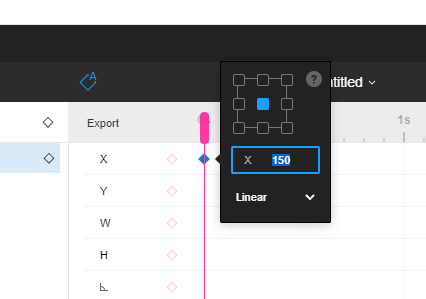
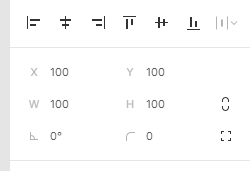
The reason of that is the rotation point, which is set to center by X and Y axies. So, the position is: X + (Width / 2) = 100 + (100 / 2) = 150.
If you want to deal with the same values as Figma you should choose top left corner of the rotation point. But don't hurry!
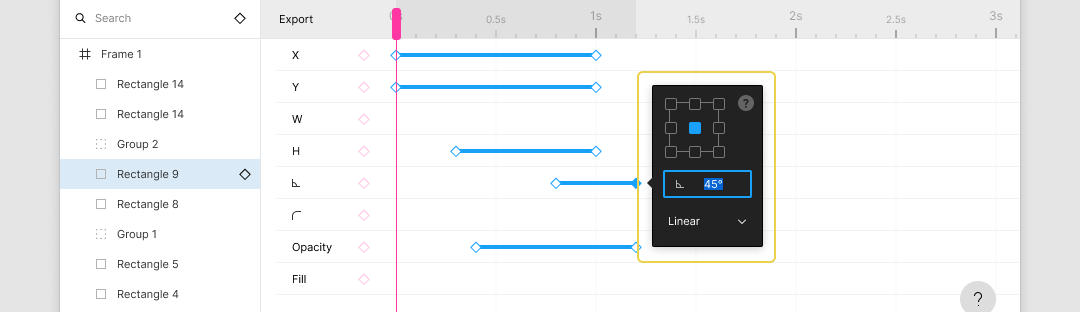
Let's move our rectangle by 100 to the right along the X and rotate by -45°.
Click on Play and see it is moving and rotating.

But what if we change the rotation point to the top left corner? It doesn't matter on what keyframe you will change the rotation point. It is common for all keyframes of the layer.
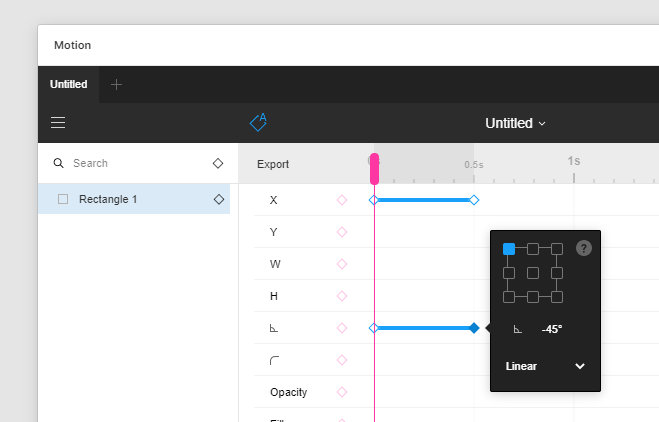
We will get moving and rotation according to the top left corner of the layer.

Some more examples.


Figma shows you X and Y values according to the top left corner of a rotation point of the layer, but Rotation value — according to the center point. You should keep in mind this when you animate something. But in most cases you will not need to change it from the center point in Motion.
4.2. Easing functions
Easing functions control acceleration and deceleration. There are 4 easing functions:
- Linear
- Ease-in — acceleration on the start
- Ease-out — deceleration in the end
- Ease-in-out — acceleration on the start and deceleration in the end
There is one more option here — Steps. It will change values immediatly without any transition.
Let's try it. We still have the rectangle moving from the left side to the right side of the frame. Select the end keyframe and open the keyframe panel. Change easing functions and see the result.


4.3. Copy/Paste
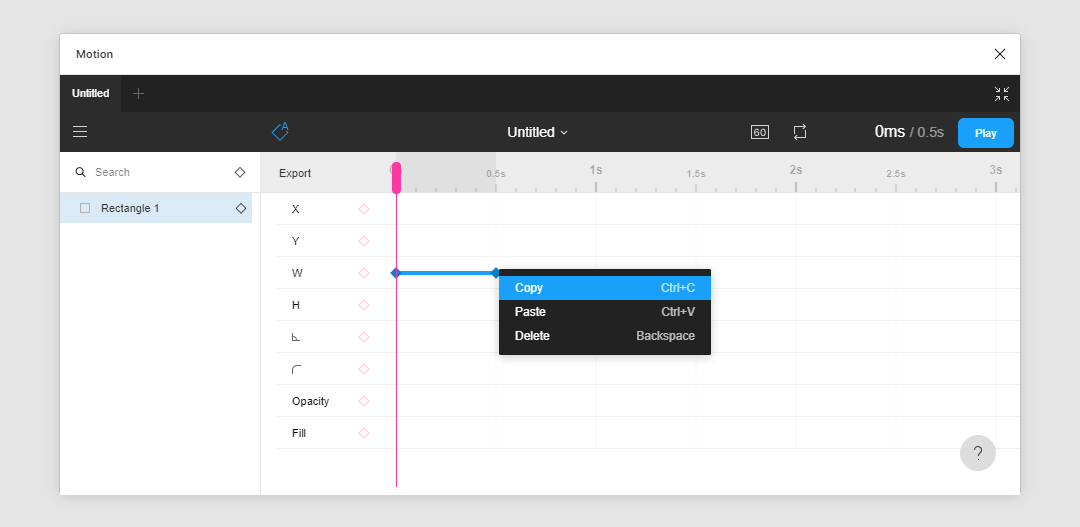
Copying and pasting keyframes is easy too. Select keyframes, press Ctrl/Cmd+C or click on Copy from the dropdown menu on selected keyframes. After that you can paste them on any layer. Sometimes it is very usefull when you animate some layers the same way.
4.4. Undo/Redo
Of course, you can undo and redo any changes in animations. Ctrl/Cmd+Z for Undo and Ctrl/Cmd+Y for Redo will help you.
4.5. Auto update keyframes
If this button is active, keyframes values will be automatically updated on current time position after Motion will be focused. You have a 1s delay after the plugin window is focused to deactivate it or press Play button and defocus the window.
So, you can add keyframes, go to its time position, make some changes for your layers in Figma and just focus plugin window. Motion will do everything.
4.6. Preview fps
You can set how many frames you will see in realtime in Figma: 24 or 60. You can change it from 60 to 24 in cases if animation is laggy. Don't worry this will not effect on export.
4.7. Repeat
There are 3 abilities here:
- No repeat
- Repeat
- Repeat and pause
The last one is quite interesting. It will pause 1s on the end of animation and only after that repeat it. Sometimes when you set Repeat you cannot see the end result of your animation. You want to have a delay before a new animation lap will start. You can add an extra keyframes for the period you want. But Motion gives you such tool — Repeat and pause.
5. Let's do it
Let's make make 3 animations using this plugin. They are quite simple, but it is a good practise to learn the basics.
5.1. Loader
Add a new Figma file. Create a frame: width = 300, height = 300. Create a rectangle: width = 200, height = 20, x = 50, y = 50.
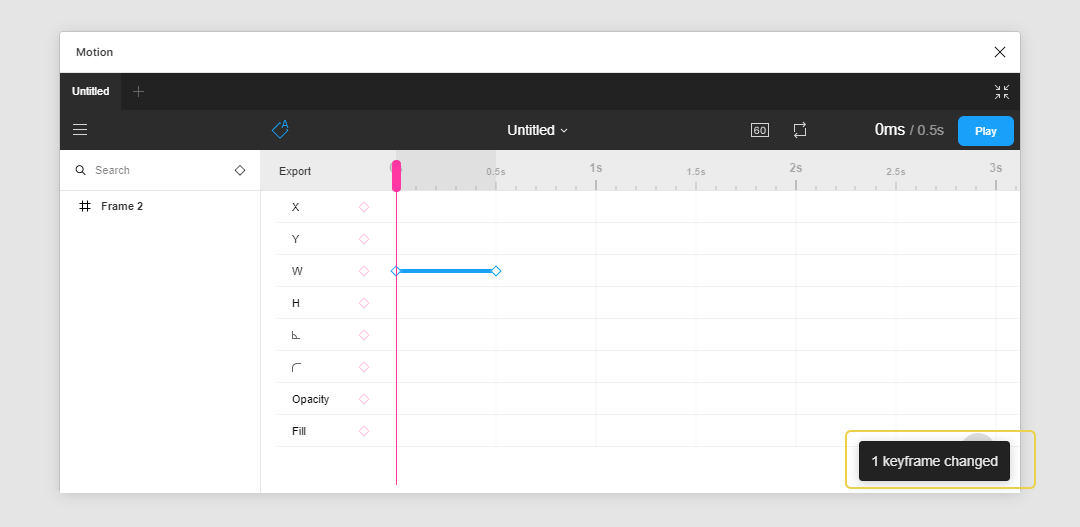
Select our rectangle. Go to Motion and add keyframe for Width on 0ms time position and one more for 500ms time position.
Be sure Auto update keyframes is active. Go to 0ms time position and change the rectangle width to 0 in Figma. You will notice that it will be set to 1. The minimal value is 0.01, but 1 is enought for now. Go to Motion and in 1s it will notify you that 1 keyframe has been updated.
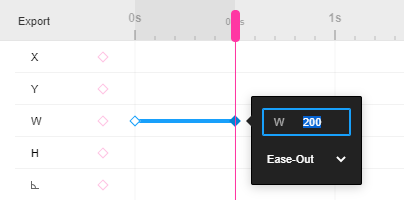
Your animation will look more natural if you set easing function to Ease-out. Select the end keyframe, double click on it to open a keyframe panel. You will see 'Linear' easing function. Change it to 'Ease-out'.
Click on Play.
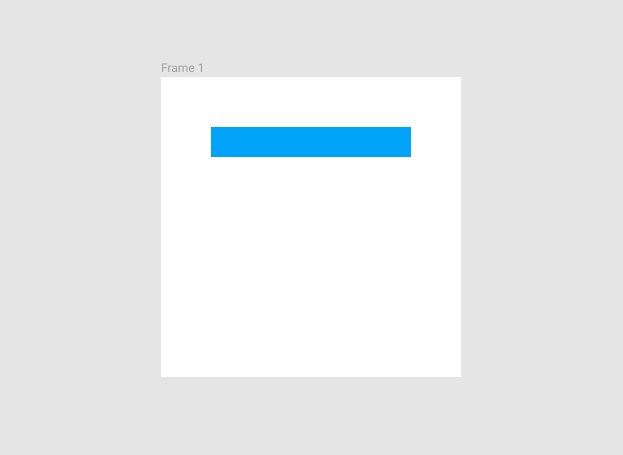
Now go to 500ms. At this time position our rectangle is wide, so we can interact with it easily. We have to copy our rectangle, rotate it by -90° and place it like on the image.

Click on Play.
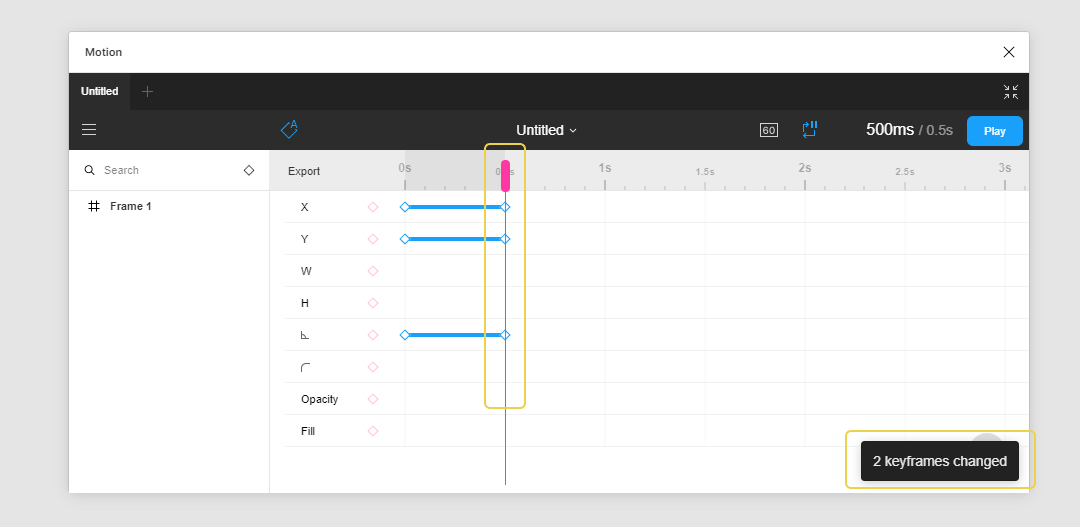
Why the second rectangle isn't animated? Keyframes of the original layer will not be copied to the new one automatically. So we have to copy the first rectangle keyframes and paste them to the second.
Select our first rectangle, go to Motion, select our keyframes and click on Ctrl/Cmd+C or select 'Copy' from the dropdown menu on any keyframe.
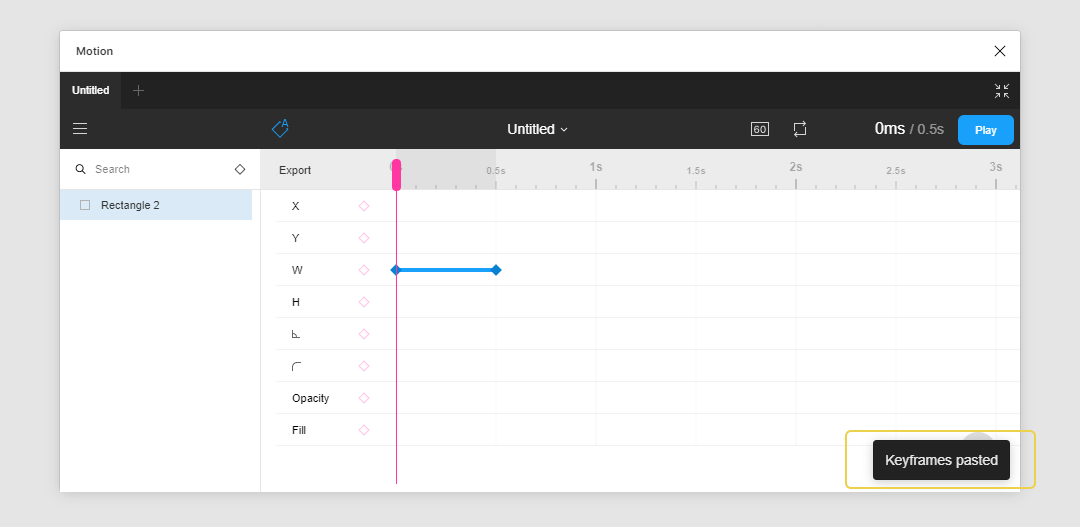
Now select our second rectangle, go to Motion and click on Ctrl/Cmd+V or select 'Paste' from the dropdown menu on any place on the timeline. Two keyframes will be pasted.
Just some clicks and you have 2 animated rectangles. Quite easy.

Let's copy our second rectangle, rotate it, copy keyframes from the previous one and paste them to the new one. After that repeat the same steps with the last rectangle. You should have something like this:
We used a little bit tricky techniques. Of course, you can make rectangles. For horizontal one you can animate Width and for vertical — Height. But we made it quicker and easier.
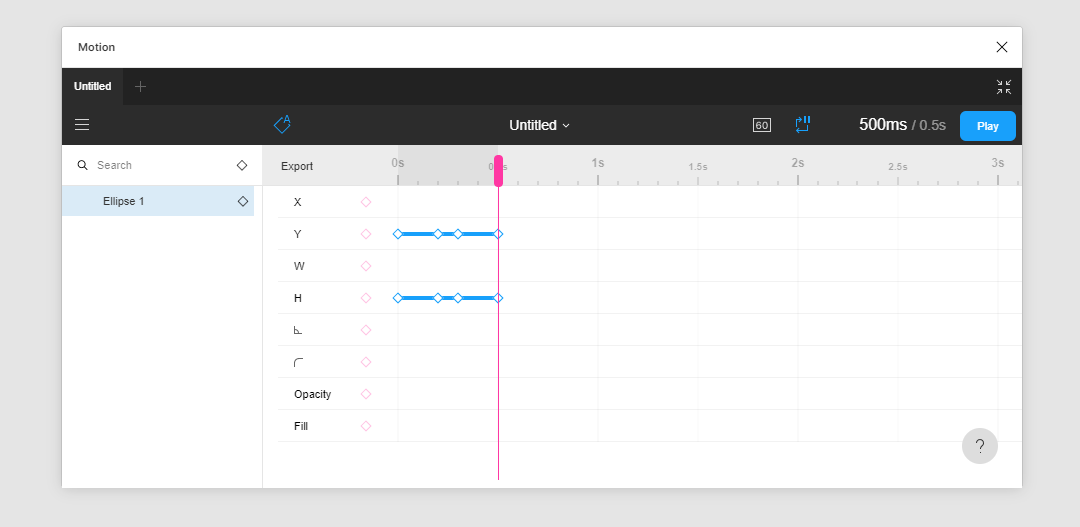
5.2. Jumping circle
Now we will make a simple animation of a jumping circle. Add new Figma file. Create a frame: width = 300, height = 300. Create a circle: width = 100, height = 100, x = 100, y = 100.

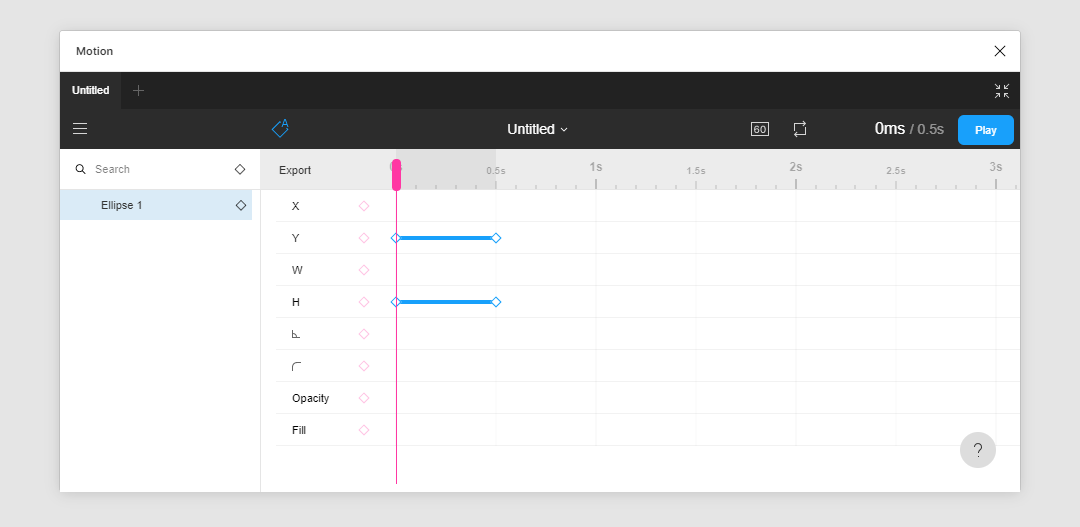
Go to Motion and add two keyframes for Y and Height on 0ms and 500ms time position.
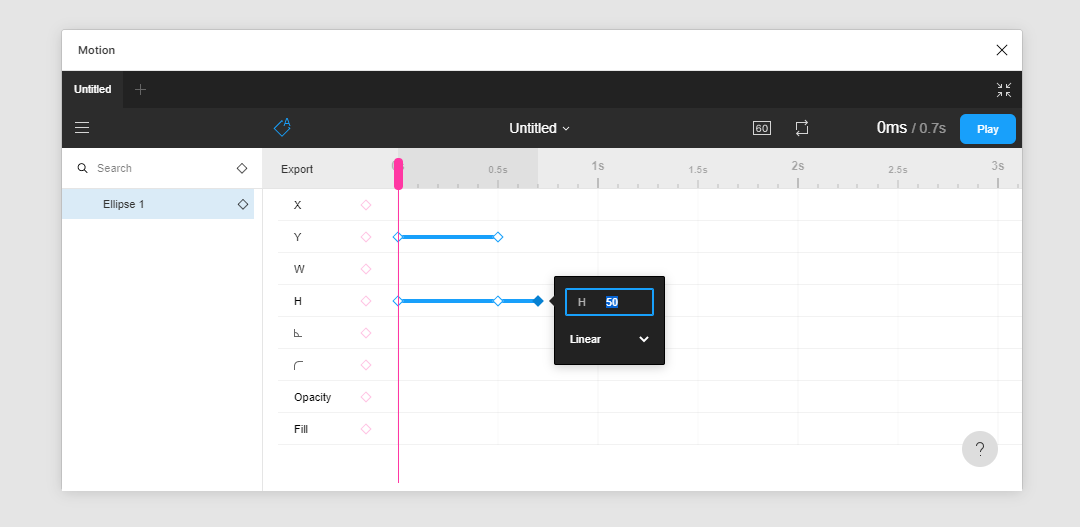
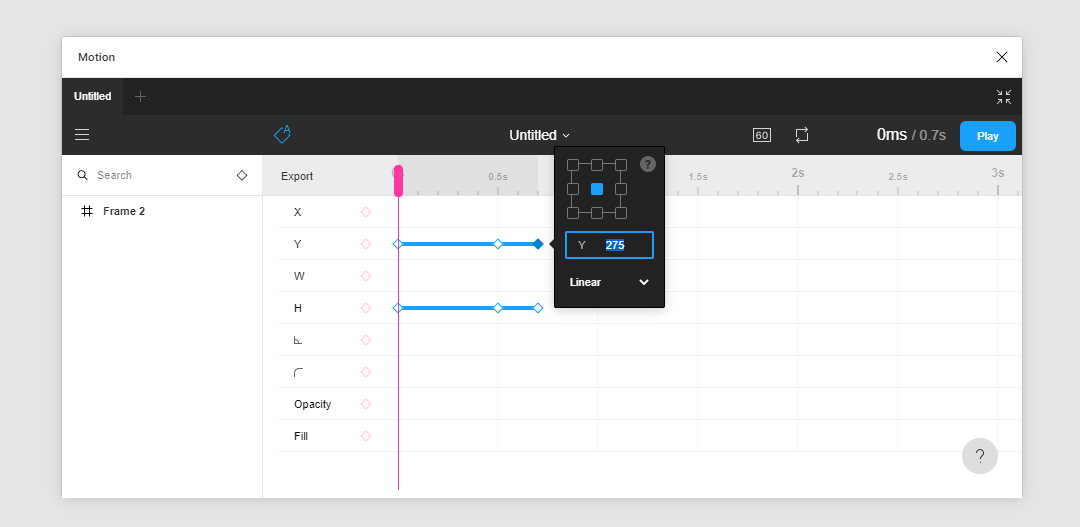
Select the end Y keyframe and change its value to 275, repeat the same for Height with the value 50. Click on Play.

Looks not so natural. So our circle should move down, then touch the bottom and only after that change its height.
Add one more keyframe for Height on 700ms time position with the value 50. Change the previous keyframe for Height to 100.

Looks better but not good. Add one more keyframe for Y on 700ms time position with 275, and change the previous one to 250.
Click on Play.

Now, we should change last keyframes for Y and Height easing functions from Linear to Ease-out.

Click on Play.

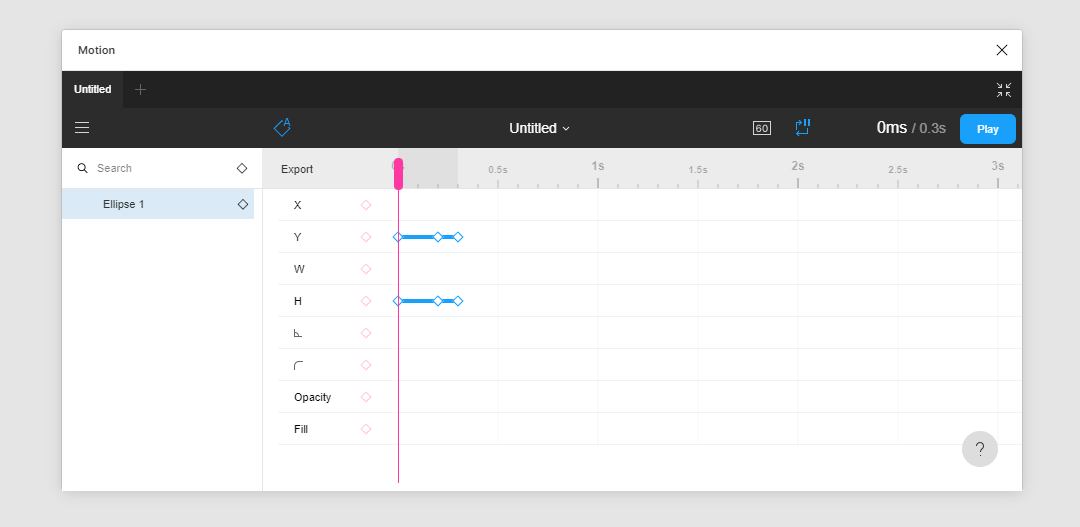
Looks better, but it is so slow. Let's increase the speed. Move keyframes closer to the start. Animation will run quicker. You can move keyframes with Left/Right keys by 100ms. If you hold Shift keyframes will move by 500ms, and Ctrl/Cmd — by 10ms.
Click on Play.

Now, let's move circle to its original position. Add keyframes on 500ms time position for Y and Height with values 150 and 100 respectively with Ease-out easing functions.
Click on Play.

Quite a nice jumping circle. Feel free to make it more natural. You can add several jumpings with fading out distance from the bottom. Try it yourself.

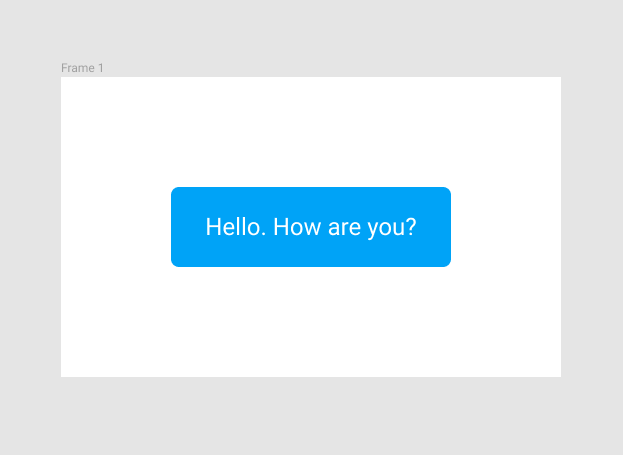
5.3. Message
Let's animate a popup message. Create a frame, a rectangle and a text. Sizes don't matter for now. In order to animate them all together we have to group the rectangle and the text or place them into a new frame.
It's good if you place them into a new frame. In the next part of this article we will learn why it is better to use frames instead of groups.
Go to Motion, add keyframes for Y and Opacity on 0ms and 500ms.
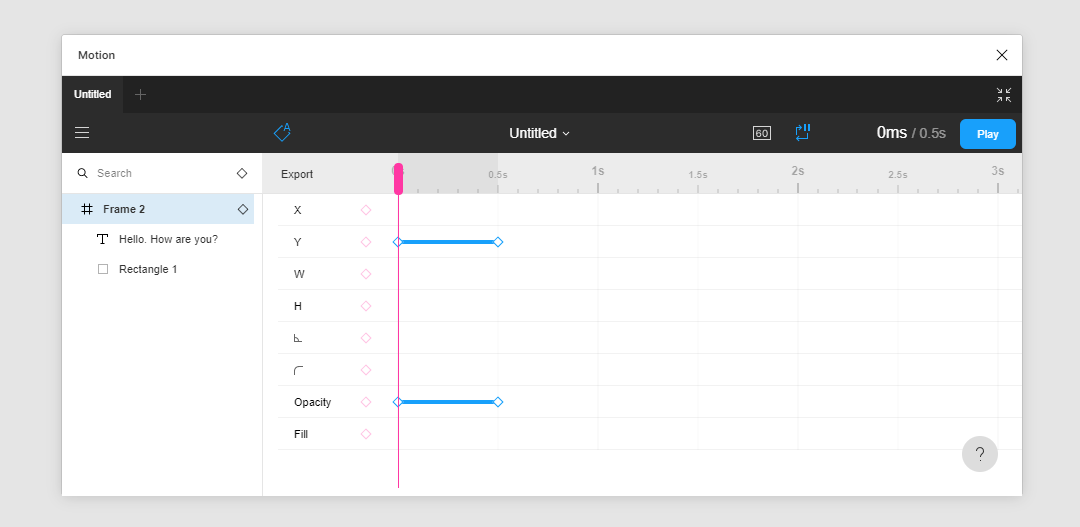
Go to 0ms, move the frame down by 30 and change its opacity to 0%. Be sure Auto update keyframes is active. Go to Motion and wait 1s until keyframes are updated. Now go to 500ms and change keyframes easing function to Ease-out.
Click on Play.
Nice popup message.
6. Conclusion
Here we learned a lot today about animations in Figma. Now you have time to practice and make your cool animations. Next time we will learn about how to share with the community and developers. We will learn how to export animations to GIF, Sprites, Frames or CSS. Of course I will tell you some new techniques and explain why you should use frames instead of groups.
Have fun :)
app design double click to like animation
Source: https://uxdesign.cc/how-to-make-ultra-smooth-animations-in-figma-motion-plugin-part-1-eaf5d1662a2e
Posted by: masonpate1995.blogspot.com
0 Response to "app design double click to like animation"
Post a Comment